
HubSpot has been hard at work developing the next phase of their Design Manager. While the current Design Manager (DMv1) makes developing on the HubSpot Platform easy with its drag and drop modules, it lacks the ability for developers to truly use the full potential of the HubSpot platform. Many developers are using coded files in order to accomplish more complex pages, designs, and functionality.
The new Design Manager (DMv2, currently in beta) is taking these pain points ino consideration and rolling out some major enhancements, along with completely revamping a component that currently lacks the most functionality but has the biggest potential—the custom module.
Throughout this blog, I will be referring to the Design Managers as DMv1 (the original Design Manager) and the DMv2 (the new Design Manager Beta). Let's begin our look at the new Design Manager.
The new DM interface
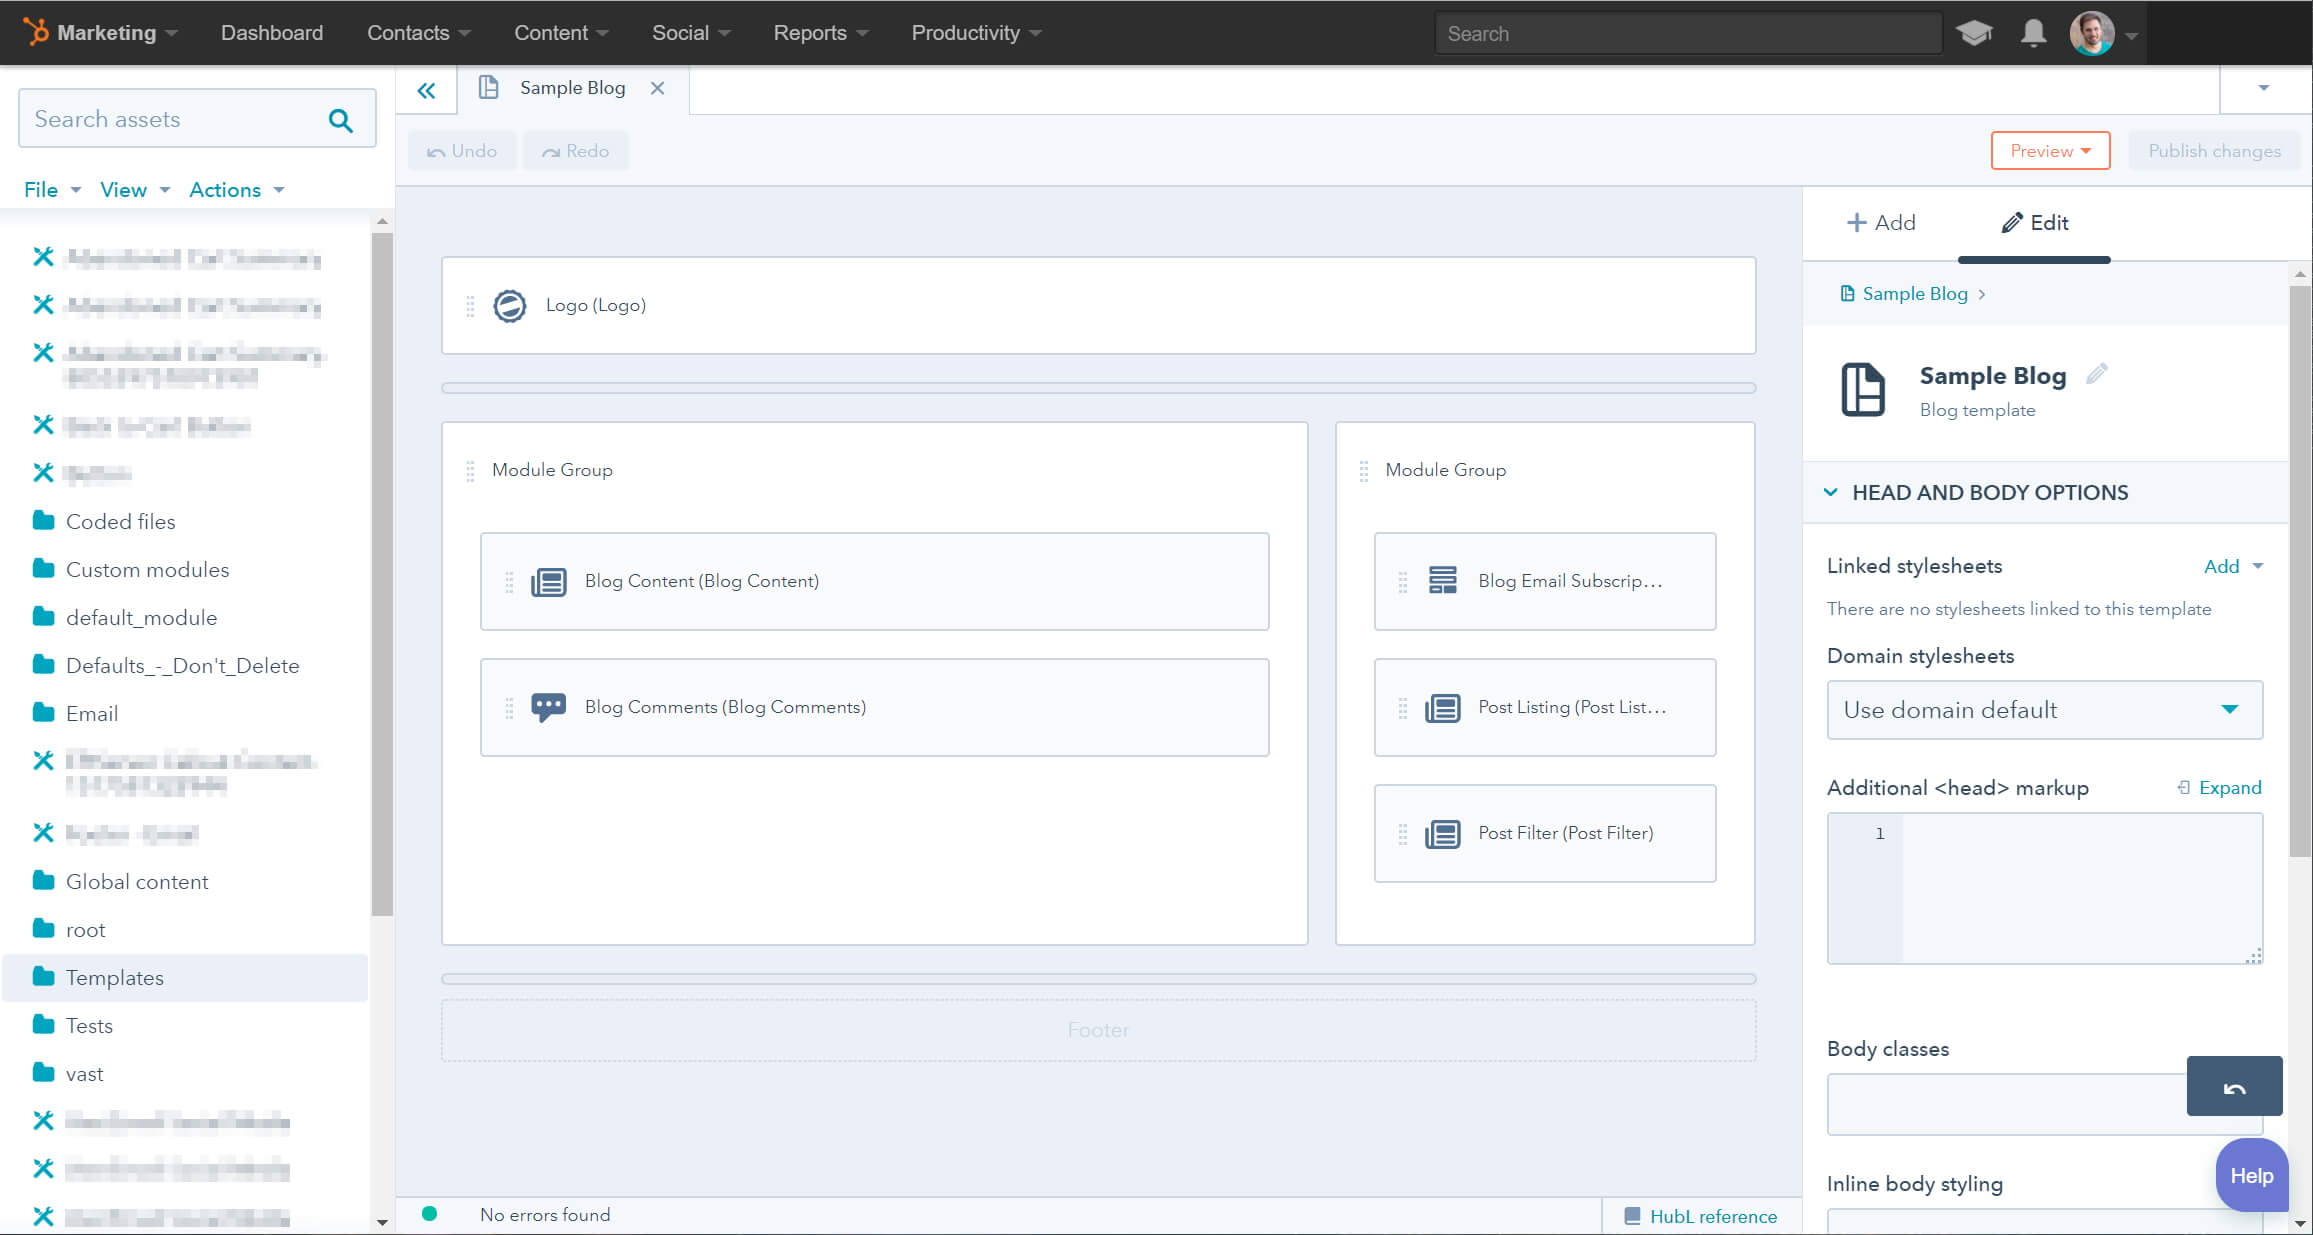
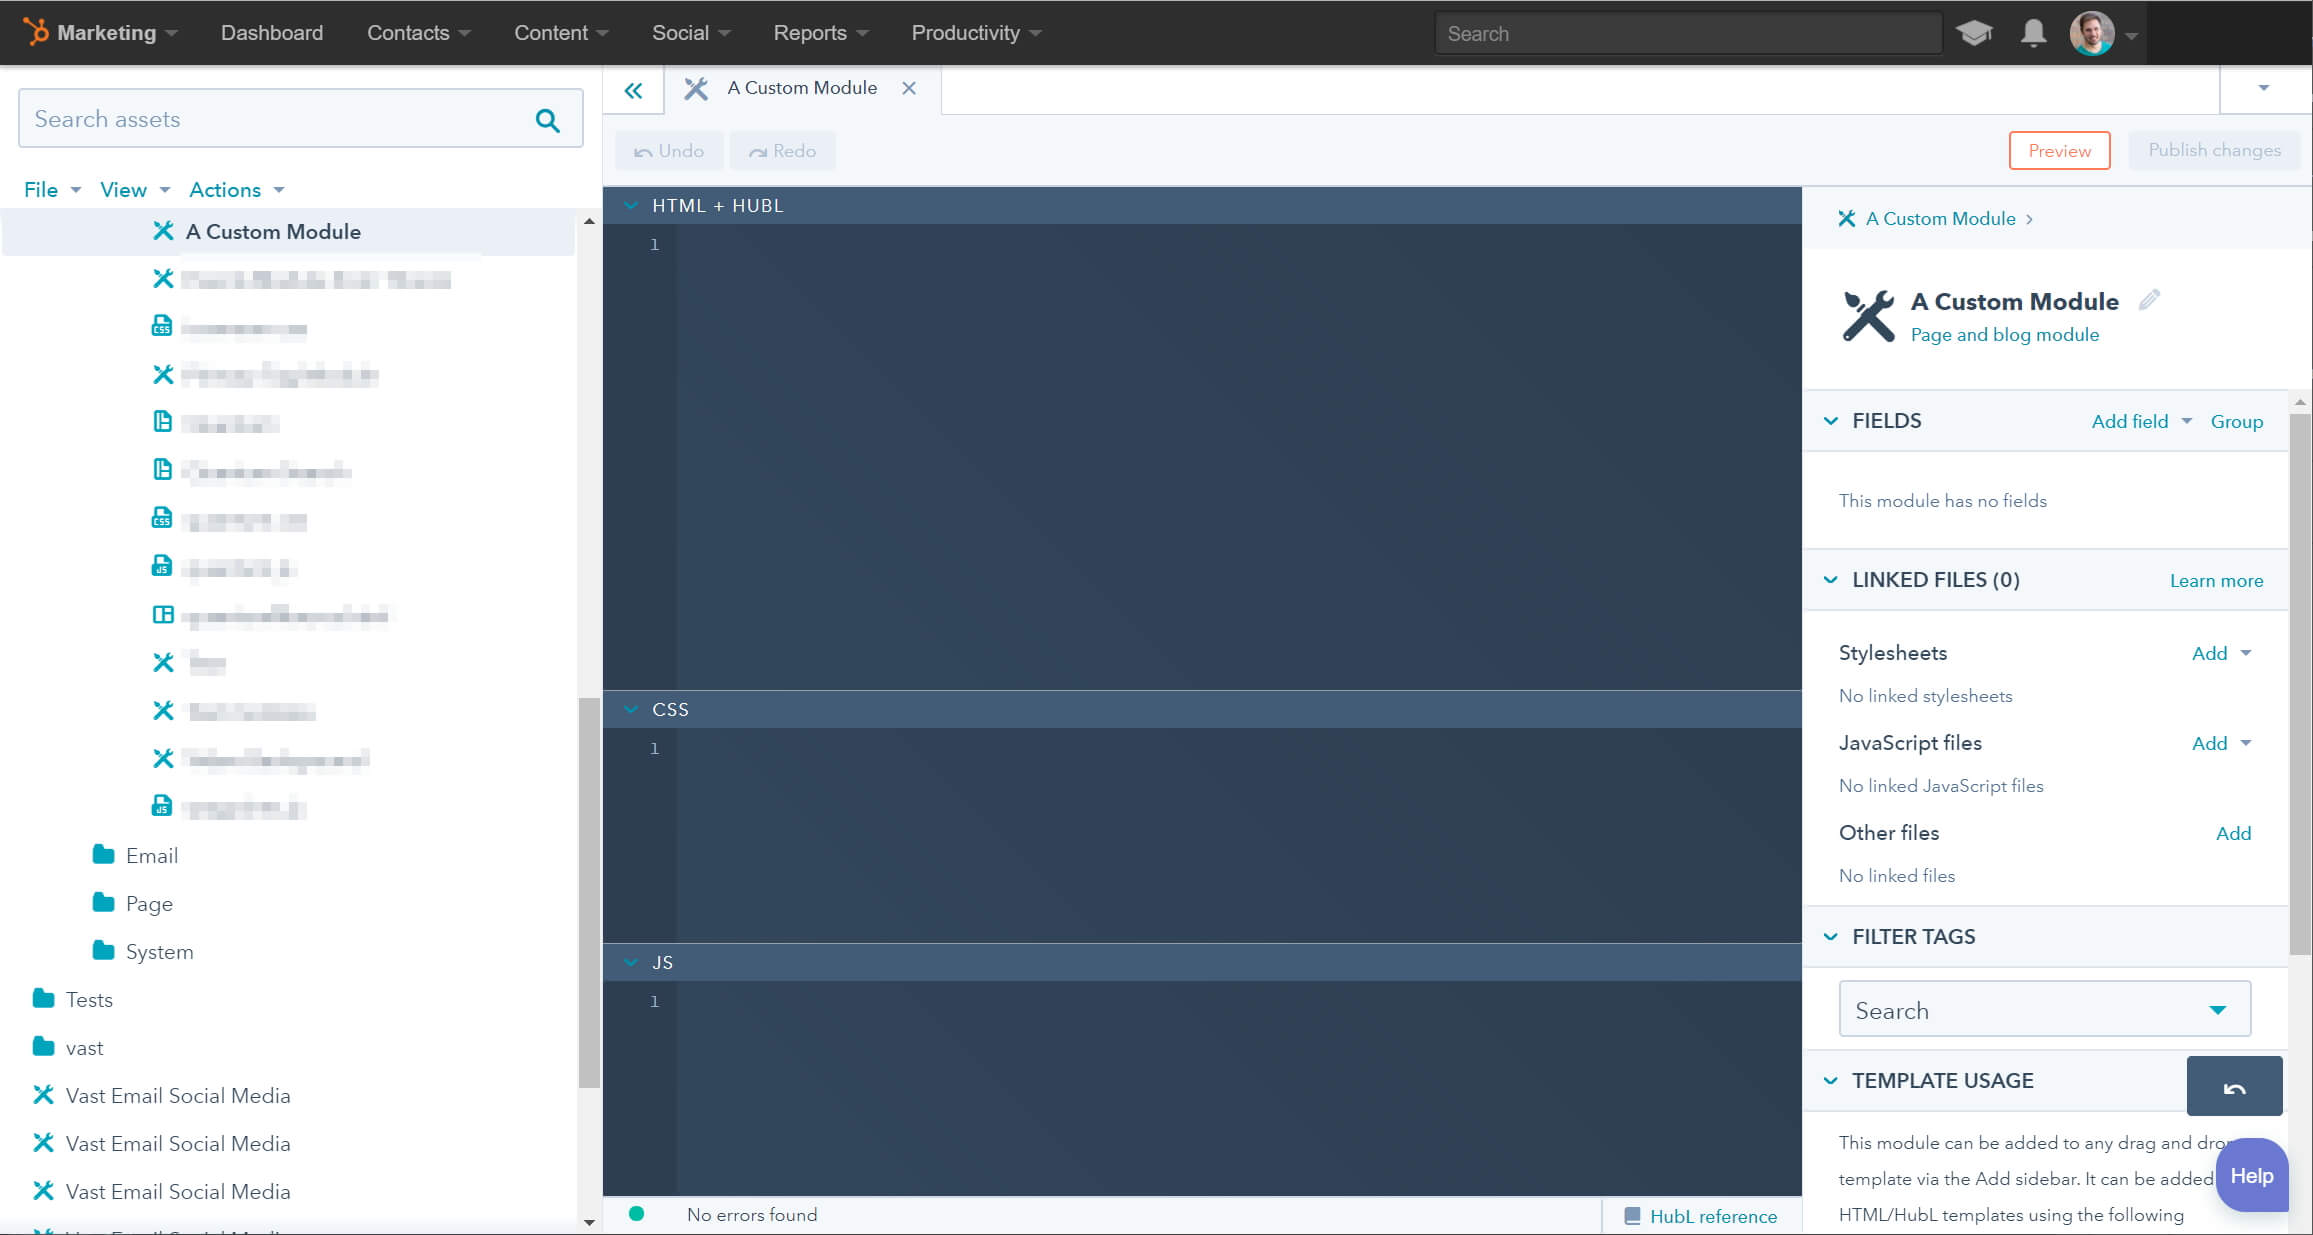
The DMv2 comes with a completely new look to the interface. One major upgrade (and an amazing one) is the ability to see your templates/custom modules on the left-hand side which replaced the old module listing. Instead, your module listing has been moved to the right-hand side and sits under an "Add" button.
The template editor itself now sits directly in the middle of these two panes and has similar functionality as it did before. The new look gives the DMv2 a nice feel and HubSpot really nailed laying out the tools and options from DMv1 in an aesthetically pleasing, user-friendly, and most of all, developer-friendly way.
The "browse" tab is no more
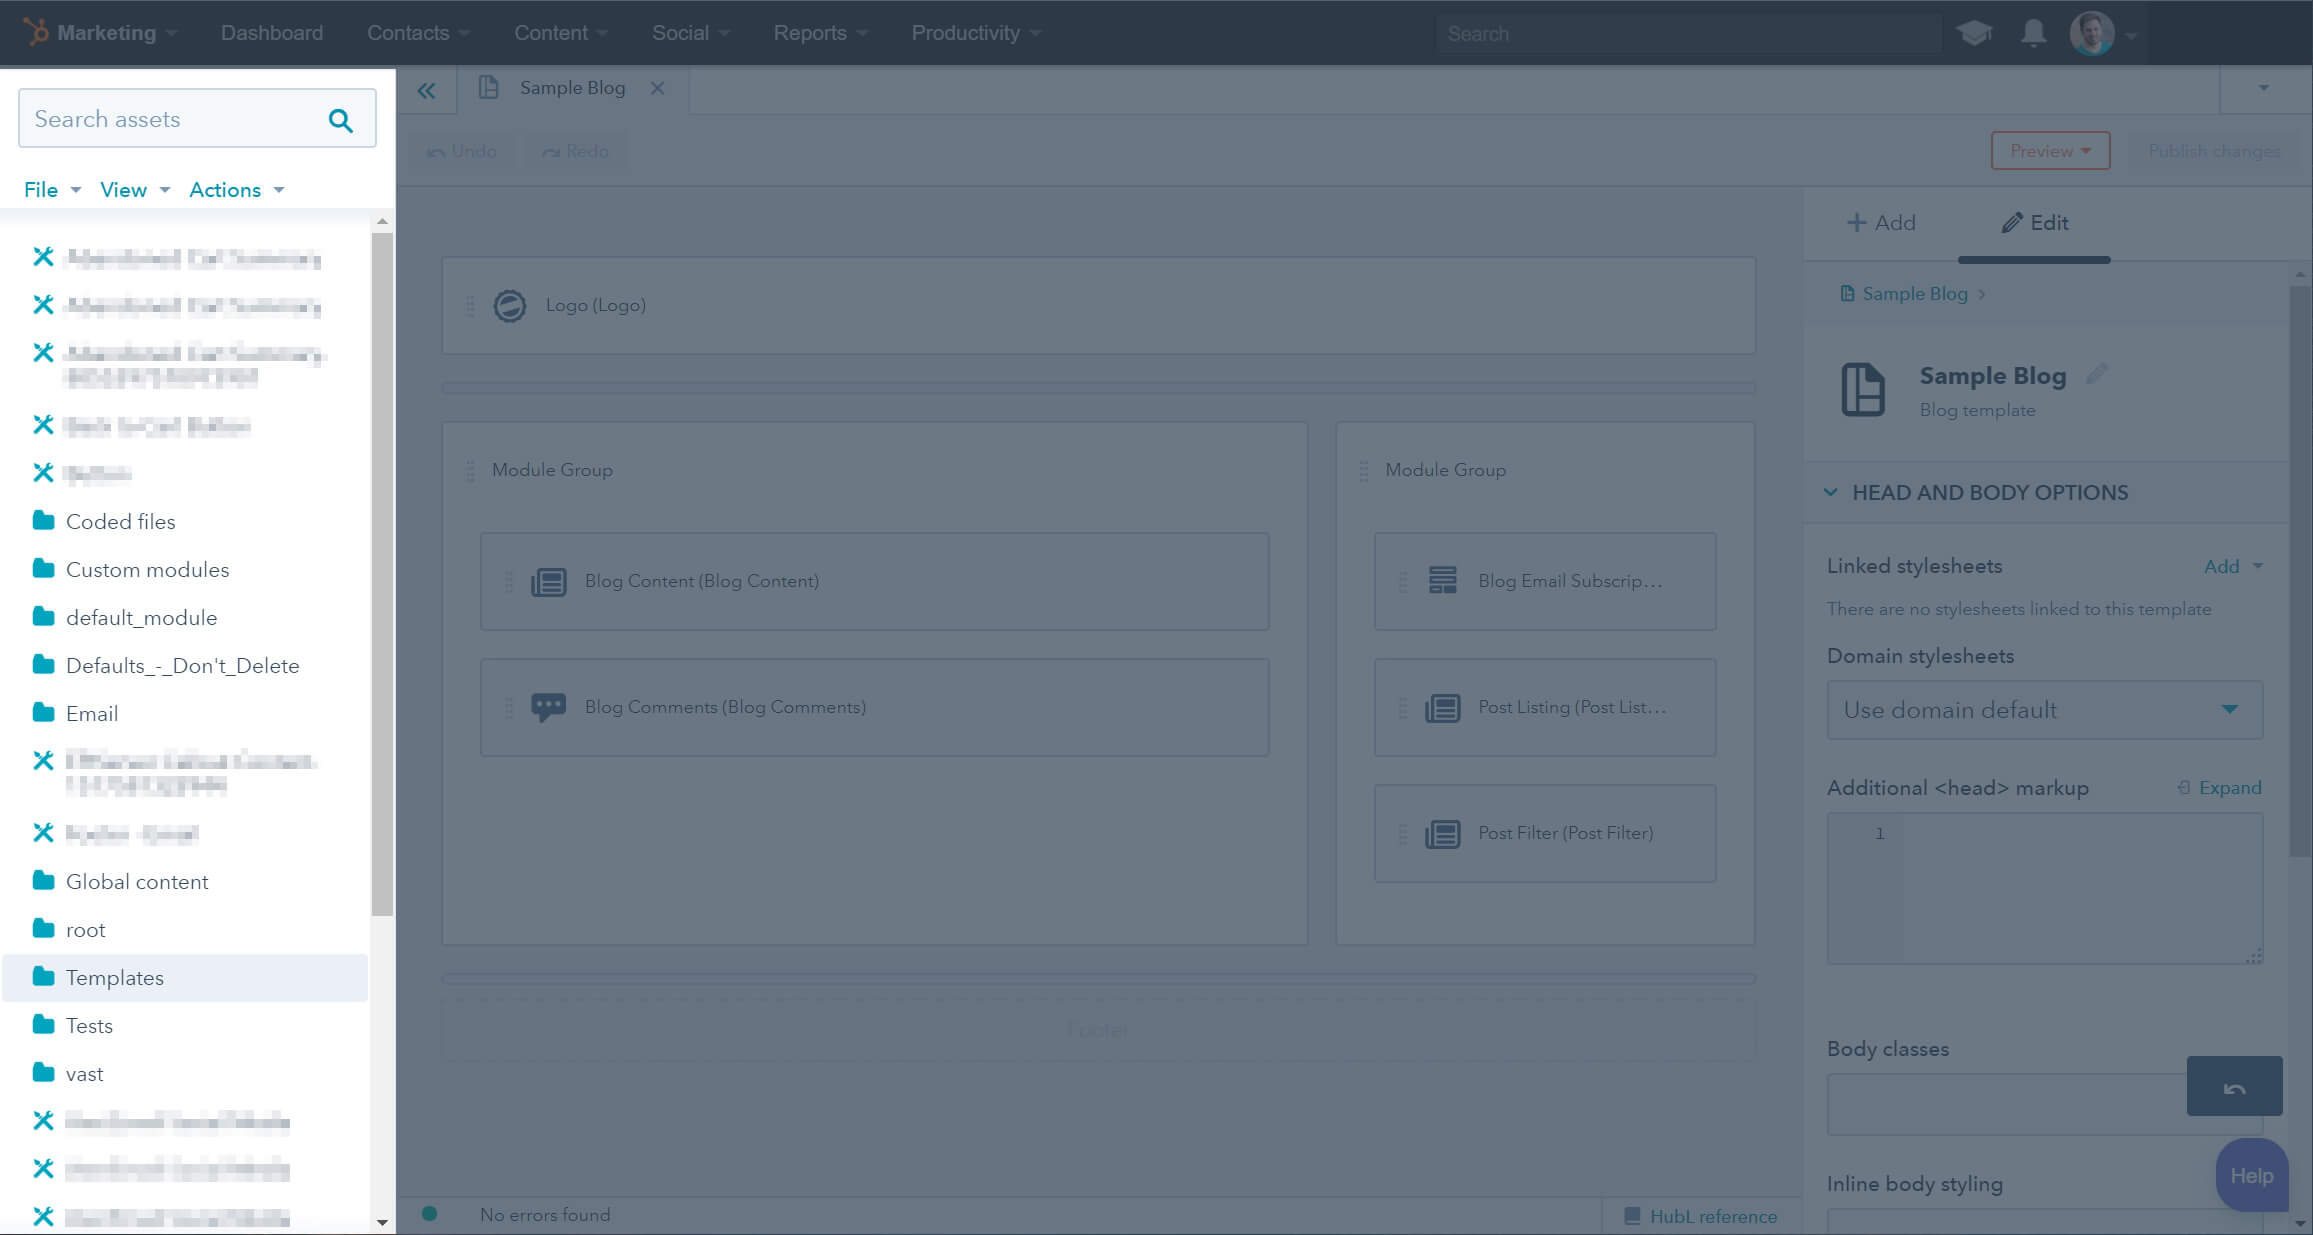
Tired of flipping away from your template because you just can't remember the name of a CSS file that you want to add your template? Good news, everyone! You can now use the left-hand panel to browse through your templates, coded files, and custom modules.
Is this the crazy WOW factor that will make you want to switch to the beta right at this moment? No, not really, but this is definitely a step up from the old DMv1. Before, switching to different templates required you to go to the "Browse" tab, meaning you had to leave your current template, and find what you needed. Now you can simply just search in the left-hand navigation and find them easier (one less step and one less annoyance).
The actions dropdown broken out
On the left-hand pane of the DMv2, you will notice there are three drop-down menus that have been added: File, View, and Actions. These menus contain all the options you previously had in the "Actions" drop-down button in DMv1, as well as bringing over other actions that were only available through the old "Browse" Tab.
Let's explore some of the action-based items that have been added to the new DMv2 left-hand pane.The right-click context menu
You can now right click on files in the pane to quickly clone templates, rename them, or even copy them to other portals (something you were only able to do from the browse tab in DMv1).
Re-labeling of the options
While this isn't as major of an update, it does help to better direct the user to what the action is, while using more industry standard terminology.
Viewing template source
One new addition to the menus is seen under "Actions > View Template Source". In DMv1 if you wanted to see the source code that made a template work you had to go through converting it a coded file and then viewing the source. This option now allows you to simply view the source without having to create a copy.
Creating folders easily and moving items
If you ever had to create a folder in HubSpot, you will understand the lengthy steps to achieve this task. In DMv2, this can now be accomplished by using the File Menu. You can also move objects around the directory structure by dragging and dropping.
If you're still not convinced to sign up for the beta from an organizational standpoint alone, then this next section will have you filling out your DMv2 beta request asap.
The edit drop down button and that little cog wheel (or gear, whichever you prefer to call it)
Any developers who have worked in the HubSpot DMv1 can tell you one of the biggest challenges was trying to do simple things like adding code to the header or going in to modal after modal after modal after modal (no, that was not a typo) to customize your template and its associated modules.
Enter the right-hand edit pane
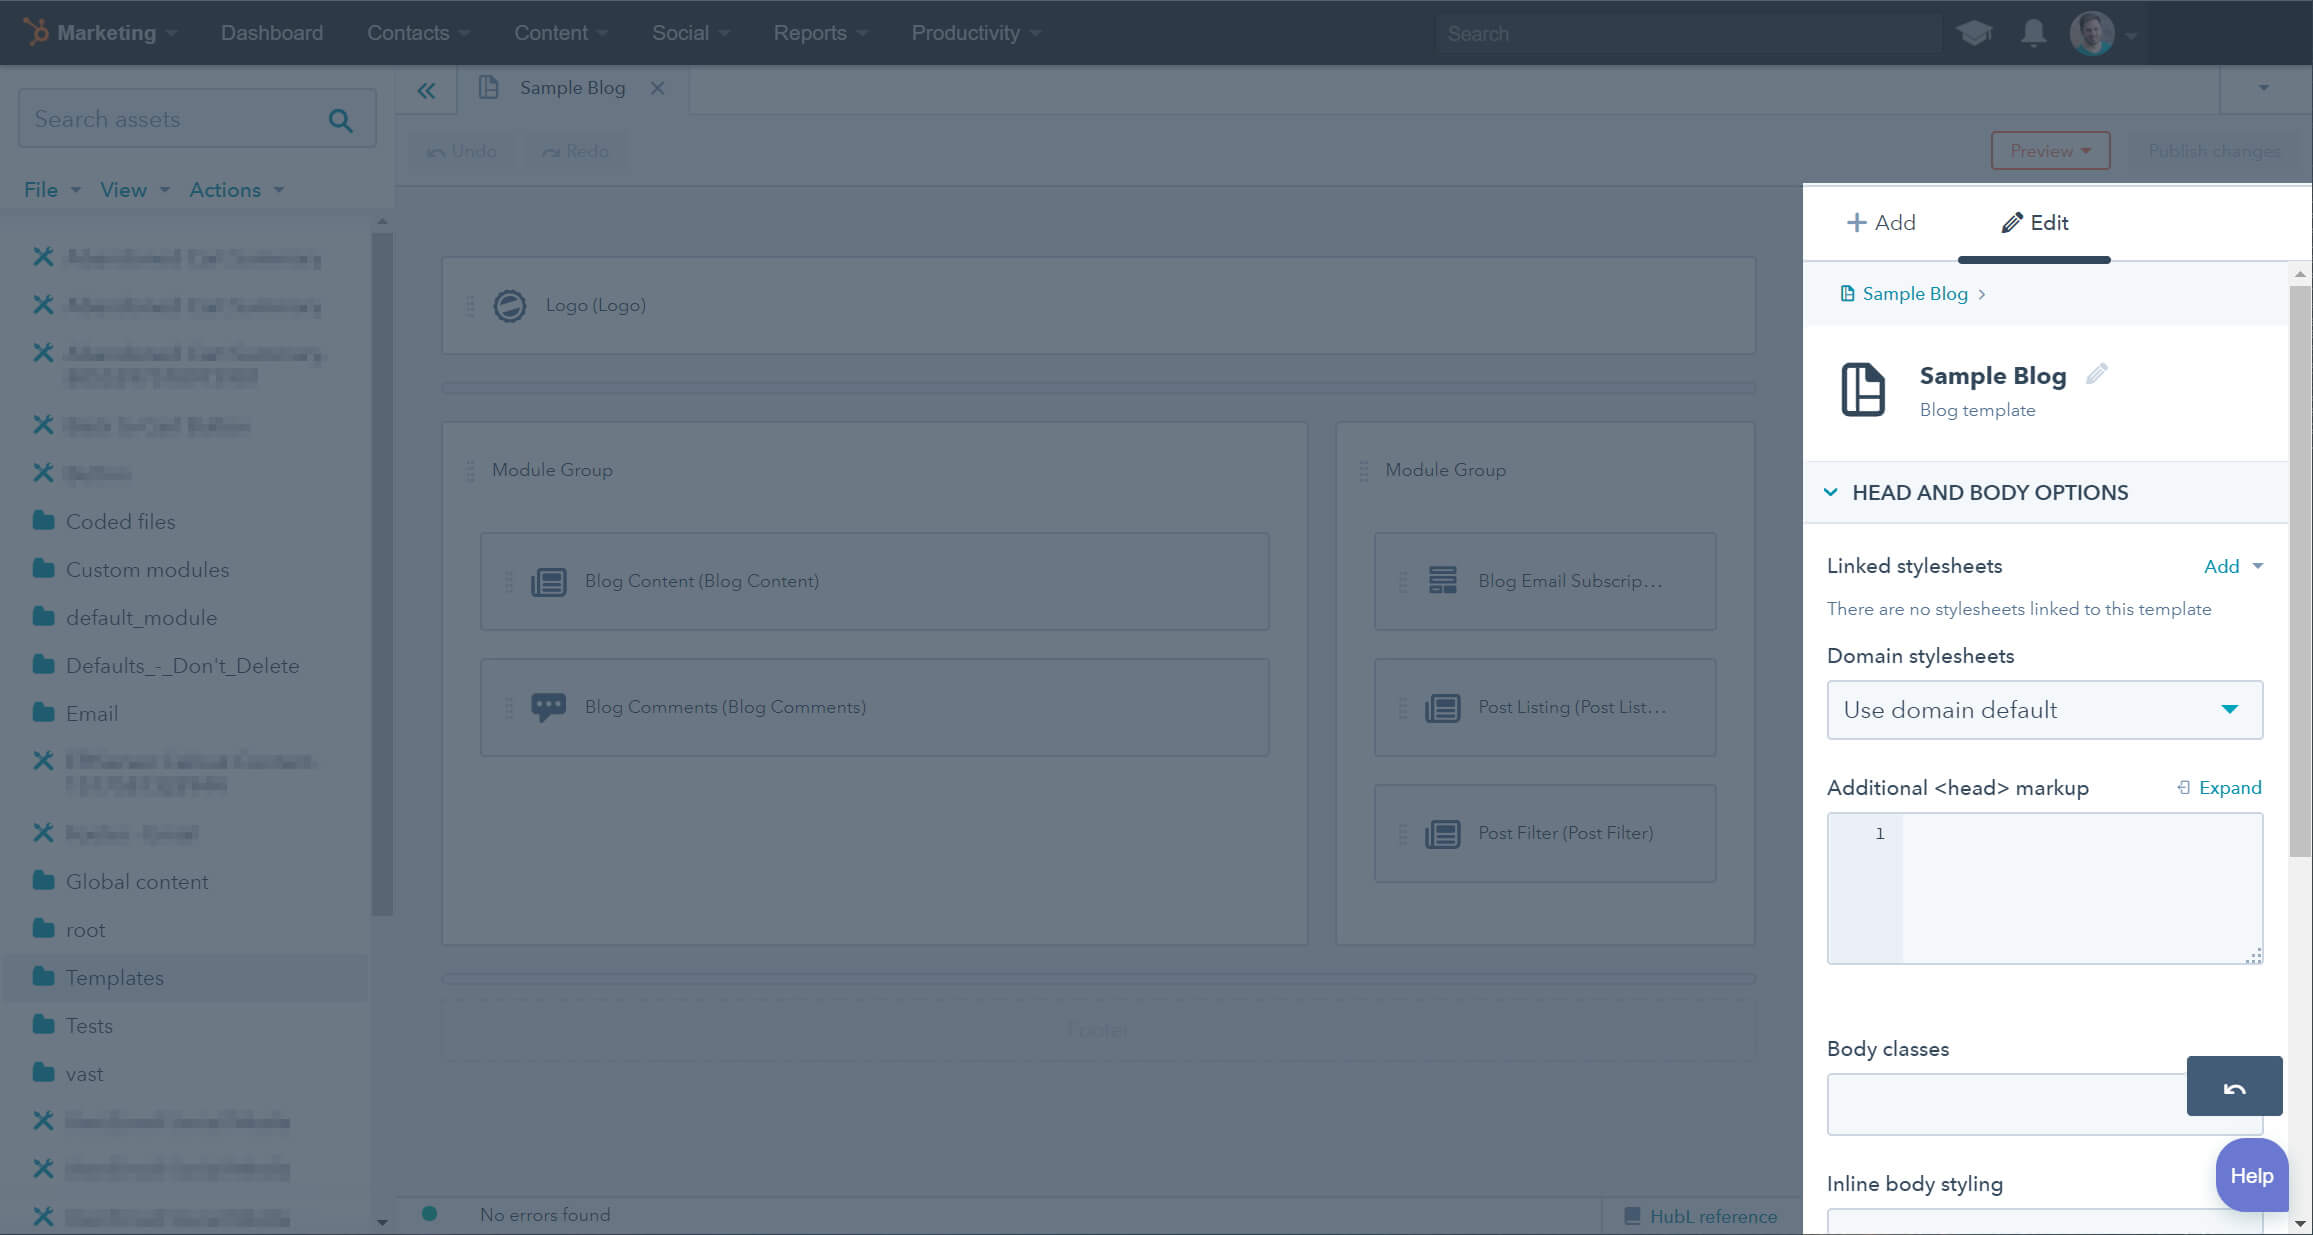
The newly added right-hand "Edit" panel is the second greatest addition to the new DMv2. When loading up a template, this panel brings everything from the "Edit Header" option of the DMv1 while also adding the ability to add other items such as linked Javascript file and more importantly additional markup before the >/body< tag. This was something that was severely lacking on a per-template basis in DMv1. The work around was done through adding an HTML/HubL module (or custom module) at the bottom of the page which could result in added white space in the bottom of your template that then required you to hide it via CSS. It's true you could also accomplish this from your content settings area; however, using that area would apply that code to all your pages which isn't necessary (or optimal) as you wouldn't want to add unnecessary code/files to pages that wouldn't be utilizing it.
The panel also changes when you click on modules inside the editor to reveal the Edit label, Edit options, and Edit CSS declarations for those particular modules. This makes editing modules easier and as stated earlier, removes having to go through endless modal windows in order to configure your modules to your desired liking. The Edit Panel also include the other options from the cog wheel such as locking, splitting, and deleting the module.
Adding Modules to your template
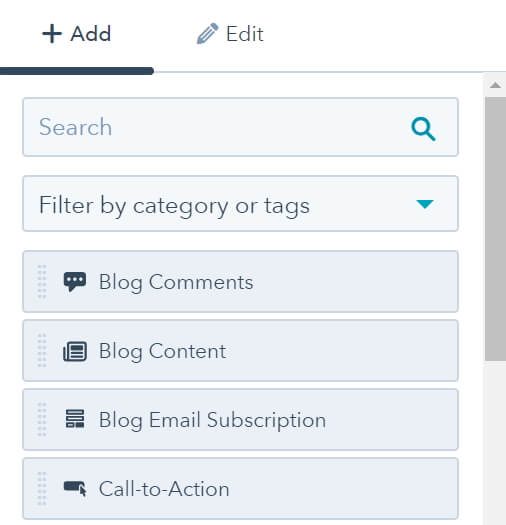
Modules have been moved into an "Add" tab that sits right next to the "Edit" tab in the right-hand panel. One thing that is a drastic change is the shift from a categorical listing to an alphabetical one. While this move is understandable it can throw you off at first if you're not expecting it. Luckily, this doesn't last long when you notice the nice drop-down filter above the listing.
One thing that some will spot off that bat is the removal of the "Html" and "HubL" modules. If your template previously had them when moving to the beta, don't worry. Your modules will not disappear from your template and will still be in the template. The HTML module is also now available from the marketplace in their new modules section. The HubL module has been depreciated and replaced with the recommendation of using a custom module in its place. While this seems like a head scratching moment, it makes perfect sense once you see the abilities of the new custom modules.
Custom Module Overhaul
Get ready, because this is the single greatest thing that has been introduced into the DMv2 and should be the thing that pushes you to the beta signup if you're still on the fence of hopping onboard. In DMv2, HubSpot has totally rethought the way it makes use of custom modules in templates and made them the single greatest tool to build out anything and everything you can think of for your HubSpot site. Don't believe me? Let's take a look.
General Module Options
If you went to create a new custom module in DMv1, once you began you were presented with a simple blank code editor screen and your option of adding fields. While this was great, one thing that made making custom modules hard was that any CSS, Javascript, or other files you wanted to include had to be added by using an import HubL statement, linked in the template "Edit head" section and coded into your CSS, or you had to use some other workarounds for getting components where they needed to be so you could use them for your module.
In DMv2, they have now added a "Linked Files" section. This section allows you to link JavaScript, CSS, and other types of files to your custom module. A huge benefit of this is that these resources won't get loaded into the middle of the page somewhere (or at the location to where you module sits). Instead, they have loaded into the header area appropriately and only added to the page when the module is on the page. This means you won't have to load resources using the edit header method only to never use that resource on any page, but one or two pages where your module resides. This can help to reduce page load times as there won't be additional calls to resources that aren't needed.
Add all the fields
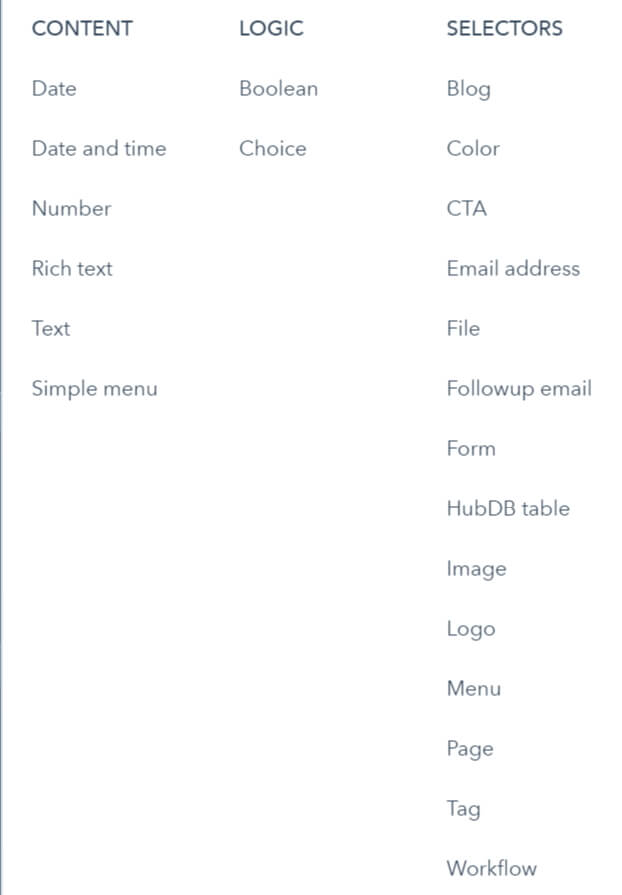
In DMv1 you had the option to add new fields to your custom modules so users could change options inside the editor and customize the module on a per page basis. These were your typical text, rich text, choice, boolean, and image fields. While these fields were great, they lacked the ability to offer content editors real options for things they tried to accomplish such as linking to interior content, entering dates, changing background colors easily, creating multiple instances of content, and other tasks.
There has been a huge addition to the fields you can add to the new custom modules in DMv2 along with some updates to the same fields that used to be in DMv1. When adding a new module, you are given fields that are grouped into three categories: Content, Logic, and Selectors. To see a listing of the new fields as well as additions to older fields, see this portion of the HubSpot Documentation: https://designers.hubspot.com/docs/modules/reference
New options for fields
Back in DMv1 when you added fields, you were presented with very basic configuration options for those fields. For example, adding in a simple text field in DMv1, you were able to add a label for front-end content editors to see along with some help/default text and give the field an internal name for use when building the module.
In DMv2, module options have also been broken out into different categories. You are now presented with Content Options, Editor Options, Display Options, and Repeater Options. Let's take a quick look at these options in relation to adding a simple text field in the DMv2.
Just like in DMv1 you are able to add your Label to the field which is the very first option presented in the right-hand editor pane. Directly below this label is where you enter your internal name for the field which has been relabeled as "HubL Variable Name." Once we've entered in that info, we can now move to the Content Options which may look a bit familiar as these are the previous DMv1 options that we had with the exception of a new (and highly sought after) field: Regex Field Validation. This allows us to make use of regular expressions to create validation patterns for values entered into this field. This will help to keep our content editors from entering in the wrong values for items inside of our custom modules.
After we've entered our Content Options, we can move to our Editor Options. One field that will look familiar is the "Help Text" field which is the same option from DMv1, however, the newly added options, which are self-explanatory, are "Make this a required field" and "Prevent editing in content editors." The options are another added benefit as many times custom modules are built for specific content that always needs to be included (like a name field for a team member module) or with fields that may be changed from a backend perspective but never a front end (such as setting which DB to pull from using the HubDB field).
Once we've finished our Content and Editor Options, we have the option of setting Display Options for our field. Often times we have fields in a module that are dependent on other pieces of information within the module (or even the page). This option allows us to set whether or not the field is shown based on certain criteria. This can be used for things such as setting the text field to only show if an image is selected from a previous selector field.
Our last set of options, Repeater Options, help us set whether or not the content editor can create multiple instances of our field. This is especially useful if you are creating custom modules such as content sliders, menus, or even custom layouts within modules. If you are enabling this option, there is some additional coding you will need to do inside of the module for the repeater to work properly. You can review this here: https://designers.hubspot.com/docs/modules/repeating-fields-and-loops
Field grouping
DMv2 also has the ability to group fields together. This helps for keeping certain options of a module together and showing them as grouped when the content entry person is using this item in the editor. For example, if you were creating a pricing table with Bronze, Silver, and Gold as your packages, you could group options so on the front end the content entry person would see "Bronze Package Options", "Silver Package Options", "Gold Package Options". Then when the user expands those options they see the fields that are relative to just that package. Back in DMv1, all you would ever see is a long laundry list of options where you would have had to label them as "Bronze Package - Price Field" and so on for all the other options just to keep some kind of order (and sanity) when providing your editors with options.
Additional options that are noteworthy
There are two additional options that have been added to the new custom modules as well. While these options are nice to have, if we didn't have them, we wouldn't be frustrated or stopping a move to the beta because of them. These are the ability to add an image icon to represent the module and tagging a module for an easier way to find the module when browsing them inside of the DMv2 left-hand finder pane.
In closing, we at Diagram are overjoyed with the new DMv2 and the endless opportunities it provides for us to be able to take customers HubSpot sites to all new heights. HubSpot is still continuously making improvements to the DMv2 and if you're apart of the HubSpot Developer Slack Channel, there is constant chatter about even more ways to improve on the DMv2 and accomplish things that previously would have been very daunting to do. Are you using the new DMv2? Do you have any questions about the new DMv2? Let us know in the comments.
Related Posts

3 Pro Tips to Make Your HubSpot Workflows Successful
HubSpot's workflows are a powerful tool for connecting with your customers. We share 3 pro tips for getting the most out of your workflows.

Custom Fields and ElasticSearch
Diagram's Ryan Duffing offers a tutorial on indexing and retrieving custom fields with Epinova.Elasticsearch for Optimizely (formerly Episerver).
Results Matter.
We design creative digital solutions that grow your business, strengthen your brand and engage your audience. Our team blends creativity with insights, analytics and technology to deliver beauty, function, accessibility and most of all, ROI. Do you have a project you want to discuss?

Like what you read?
Subscribe to our blog "Diagram Views" for the latest trends in web design, inbound marketing and mobile strategy.