Implementing Episerver Forms: A Developer’s Guide
We offer a guide for developers who want to implement the Episerver Forms add-on, which provides a great deal of flexibility and customization for site owners.
When Episerver released version 7 of their CMS, it included a great new feature called Blocks. The Blocks feature streamlined how to build dynamic pages when combined with content areas. However, in that release, Episerver still used XForms for building front-end web forms for site visitors. XForms were nice for setting up simple forms, but they didn’t include native features such as file uploading, and customizing them wasn’t an intuitive process. Fast forward to Episerver version 9, and they now have expanded on the Blocks feature for the new Episerver Forms add-on.
This add-on provides great value for site owners, allowing them to combine a wide variety of form fields with content personalization to create dynamic, customized forms, so we wanted to take a closer look at how Episerver developers can get started using this great tool:
Installation
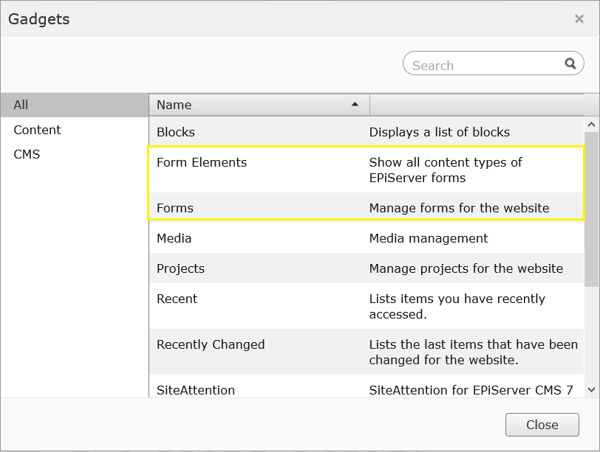
Adding this new add-on is as simple as installing the Episerver.Forms package from the Episerver NuGet feed in your website’s Visual Studio project. Once installed, the new forms are ready to be created and used in the UI, all that is needed is to add the Form Gadget to the UI.

In addition to creating dedicated form pages, forms can also be added to any page that has a Content Area property that allows unrestricted Block types. This is because, under the hood, a form is just a Block type with a Content Area property where you can add form elements.
Form Elements
Many form elements are provided out of the box, ranging from simple form elements like text boxes, select boxes, and buttons, to more advanced fields like Captcha, file upload, and even a Form Step for multi-step forms. All of these elements inherit from an ElementBlockBase class, which is the only type allowed in the form element Content Area.
Form element display can be customized fairly easily, since they too are just Blocks. The default path of element views are found at modules\_protected\EPiServer.Forms\Views\ElementBlocks, but this can be overridden by adding custom views in the Views\Shared\ElementBlocks folder, which can be simplified by copying the existing item into the new location and changing as needed. The custom view files can also be converted to Razor views.
The new forms are not only customizable in their display, but new elements can be created by inheriting one of the base classes that utilize ElementBlockBase such as ValidatableElementBlockBase or InputElementBlockBase. Then, a view for the new element can be added to the views path as noted above.
Another great bonus, since the foundation of the forms add-on is Block and Content Area-based, is that form elements can utilize the built-in personalization provided by Visitor Groups. This allows you to make sure that you are not asking visitors for information you already have, such as profile information if the visitor is logged in. For example, a name text box can be shown to anonymous users, but a hidden field can be used to populate the name if it is already known, omitting the need for the user to fill out that information.
Handling Submissions
The default functionality for handling submissions is also very comprehensive. Data can be stored in the database and emailed with a custom message using placeholders to insert form data. In addition to this, developers can also build functionality or use a 3rd party service that can consume form data via Webhooks, which are set up in the Settings of the all properties view.
Webhook submissions can easily be handled by WebApi, as illustrated in the controller snippet below:
using EPiServer.Logging.Compatibility;
using Newtonsoft.Json.Linq;
using System;
using System.Collections.Generic;
using System.Linq;
using System.Web.Http;

namespace Demo.Web.Controllers.WebApi
{
    public static class DataHelpers
    {
        ///
        /// Returns fallback value if key isn't found or value is an empty string
        ///
        public static object FallbackIfEmpty<TKey,TValue>(this IEnumerable<KeyValuePair<TKey,TValue>> items, TKey key, TValue defaultValue)
        {
            var item = items.FirstOrDefault(x => x.Key.Equals(key));

            if (item.Equals(default(KeyValuePair<TKey, TValue>)) ||
                (item.Value is string && string.IsNullOrWhiteSpace(item.Value.ToString())))
                return defaultValue;

            return item.Value;
        }
    }

    [RoutePrefix("api/webhook")]
    public class WebhookDataController : ApiController
    {
        private static readonly ILog _Logger = LogManager.GetLogger(typeof(WebhookDataController));

        [Route("contactus")]
        [HttpPost]
        public string ContactUs([FromBody]JToken jsonbody)
        {
            try
            {
                var dataset = jsonbody.ToObject<List<KeyValuePair<string, object>>>();
                string name = dataset?.FallbackIfEmpty("Name", "No name") as string;
                string comments = dataset?.FallbackIfEmpty("Comments", "No comments") as string;
                DateTime? submitDate = dataset?.FallbackIfEmpty("SYSTEMCOLUMN_SubmitTime", DateTime.MinValue) as DateTime?;

                _Logger.Debug($"Contact us form submitted with name = {name}, comments = {comments} on {submitDate}!");
            }
            catch(Exception e)
            {
                _Logger.Error("Failed to process contact us!", e);
            }

            return string.Empty;
        }
    }
}
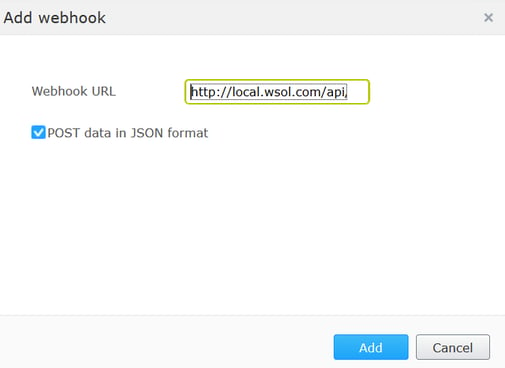
In the Settings tab, simply set the URL of the webhook (e.g. http://local.diagram.com/api/webhook/contactus) and check POST data in JSON format in the dialog box, after selecting the plus sign icon to add a new webhook.

A New Property Type
The UI editors for webhooks and e-mail template settings are also very handy. They are reminiscent of the repeatable group boxes in Ektron smart forms. They could conceivably even be extended to create repeatable elements of a page. For example, if you wanted to have an accordion list, the traditional Episerver approach is to add blocks to a content area, whereas in Ektron, a repeatable group box would be created with the properties, eliminating the need of creating new Blocks.
Under the hood, Episerver forms utilize the EPiServer.Forms.Core.PropertyGenericList<T>, which is derived from the EPiServer.Core.PropertyLongString built-in property type. The T in the generic property looks to need any class that implements System. ICloneable. Are there any developers looking for a challenge of putting these parts together for a blog? If so, please let us know!
Looking Forward
Episerver’s new Forms add-on is a very welcome addition to an already extensible CMS platform. Creating and working with forms is now an intuitive experience that builds on the already solid foundation of Blocks, and webhooks greatly simplify the process of integrating 3rd party systems. The future of forms in Episerver is looking very bright.
If you’re looking to begin using forms on your Episerver website and need some help getting started, please don’t hesitate to contact us, and we’ll work with you to build the forms the provide the most value for your site visitors. If you have any other questions or want to share some tips of your own, please feel free to leave a comment below. We’d love to hear from you!
Update 12/2/16: The code used has changed in Episerver Forms later than version 3.x. To see newer code for Episerver.Forms 3.x and above, please see this example of Webhook handling.
